Decals – make your own for RC airplanes with an Inkjet Printer
When I purchased my FW190 at a model show I neglected to check if there were any decals in the kit.

For several reasons I didn’t start the kit for a couple of years after I bought it. AeroTech went bust so I couldn’t get any from them.
I searched around and I couldn’t find any that suited or were at a reasonable price so after a bit of searching on the net I decided to make my own.
Water Slide Decals
I’ve used water slide decals that I could print on my inkjet printer. Once printed and dry you spray them with acrylic varnish and leave to dry for a least a day.
The decal paper I used came from Crafty computers but they have gone out of business but Amazon can supply the same product.
Software to print your decals
I originally used Visio to create the insignia but now use Affinity Photo which is very powerful and at a very reasonable price, less than £50 in 2020. Any graphics package should work as long as you can install fonts on to your computer.
After some more searching on the internet, I found a Luftwaffe font and installed it. http://hans.presto.tripod.com/fonts/stencil5.html I was then able to run quite a few test prints on normal paper to check the sizing and once I was happy with them I could then use the waterslide paper.
You need to set your printer to the best resolution when you’re ready to print off your decals. Once printed leave them to dry, the ink will be wet for a while. I left mine for a whole day but I think a couple of hours should be OK. Once dry then spray with acrylic varnish. I left the sheets of decals to dry for a couple of days and then proceeded to fit them.
Its just like the old Airfix kits but be very careful because when the decals are wet they are very delicate. Spray the areas where the decals are going with water first, this allows you to slide them a bit but don’t pull too hard or else they’ll tear. Once in position use a paper towel and an old credit card to expel the excess water but do this very carefully. Leave them to dry for a good couple of days and then spray the decals with some more acrylic varnish on the plane to seal around the edges.
My FW190 is a nitro plane so I hope with the decals last. Update – the decals lasted longer than the plane. Here’s my a page with what happened to her, on my third one now.
Self Adhesive Film Decals
I used a self-adhesive decal paper which is available in clear and white backgrounds, available from Amazon.
I apply them in the same way. Use some soapy water and then cut out the stickers, wet the area and then position the decal. Using soapy water allows you to move them around to get them exactly right and then use a paper towel and credit to squeeze the water. You’d think the soap content wouldn’t allow them to stick but it all comes out with water. Used this many times and it works great on my Lancaster and Vulcan


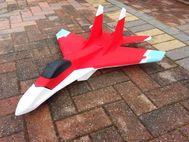
Decals created with my Vinyl Cutter
I purchased a Silhouette Cameo 4 Vinyl Cutter to make decals. This is a bit of an investment in time and money but the results are very good. I was very pleased with the F18 which put my skills to the test. Sadly I crashed the F18 and she has a broken nose. It’s currently in the repair bay waiting for some attention.