How to cut foam with a CNC needle cutter
In the post, I’ll explain how I built my CNC Needle Cutter to cut foam boards for RC aeroplanes. If you’ve made any foam board RC aeroplanes, you know there is a lot of cutting. I wanted a better method to cut these parts out.

Why a CNC needle cutter?
I did consider a diode laser cutter, but white depron foam doesn’t cut very well due to the wavelength. It would need a much more powerful CO2 laser cutter. I didn’t want to go that route due to expense and the limited space I have. Lasers can be dangerous if you don’t take the correct safety precautions. I also considered a drag knife on the router, which works well, but the needle cutter seemed a good solution and something quite interesting to try as well.
It basically works like a very fast sewing machine needle piercing the foam. It uses a brushless motor, usually used on an RC aeroplane with a speed controller and a servo tester to control the speed.
Inspiration
I’ve built several foam board models in the past and recently built a MiG-29 and an F-18. These both fly well.

But if you’ve made any foam board planes, there is a lot of cutting. Some companies, like FliteTest, provide laser-cut kits. I did build one of their planes a few years ago, and it was a quick build. But due to import duties and shipping was quite expensive for what it was.
I’d recently stumbled upon Jetworks.Online who have taken foam board planes to the next level, utilising 3d printers to make some parts, their models can still be built without a 3d printer if you don’t have one.

So I decided I wanted a better method of cutting the foam. It could be argued that the time taken to generate the g-code from the plans takes longer than cutting foam, and that’s true. But if I crash and need a new part, I can just run the file in the CNC machine. Working from printed plans, it may not always be possible if you have used glue or have not kept them.
Needle Cutter Design
A guy called Edward RC has made a version of the needle cutter that looks very good, and my conversion is based on his and others’ good work. Please watch his videos. There is a lot of good information here. A few guys have adapted their CNC routers to run the needle cutter and posted Z-axis versions on Thingiverse.

I modified one of the STL files available on Thingiverse with CAD software to fit my OX CNC router Z-axis.
Although I only have a cutting area of 315 mm x 520 mm, this will still cut most parts out. I can slice up the bigger parts in the software and then glue them together.
Parts required
I used the following
- 12V 5A power supply
- 2212 1000Kv Brushless motor
- ESC Speed Controller
- Servo tester
- MR63ZZ Miniature Ball Bearings
- Washers for ball bearings
- 0.6mm 23 SWG Stainless Steel Wire
- MIG welding tip 0.030″/0.8mm M6
- M3 Screws
Optional - Jewellery pliers to create a loop “Forming 3 three-step wire bending looping concave round nose pliers”
Assembling the Needle Cutter
This is quite simple; the most important part is to balance the flywheel. Edward’s video above shows how to do this. I added a nut support for the MIG welding tip, as I found it was more stable.
Create the loop in the wire and sharpen the point as Edward shows. I added some grease to the needle and inside the welding tip.
Powering the motor
The brushless motor needs an ESC(Electronic Speed Controller) and RC servo tester. The motor uses very little current when running. I measured this with a clamp-on meter and found it to be around 1 amp. Therefore, the speed controller isn’t under real load. I had a few kicking around from previous projects and used a 25-amp HobbyWing ESC. But any cheap controller above 5 amps will be more than adequate.
I purchased a 5-amp 12-volt power supply to power the ESC. You can use a 3s Lipo battery if you prefer. Connect the controller to your servo tester output connection and set it to manual on the lowest setting.
Speeds and Feeds
Using the servo tester and a tachometer (see video) I adjusted the speed of the motor to 8500 rpm and made a mark with a Sharpie on the tester.
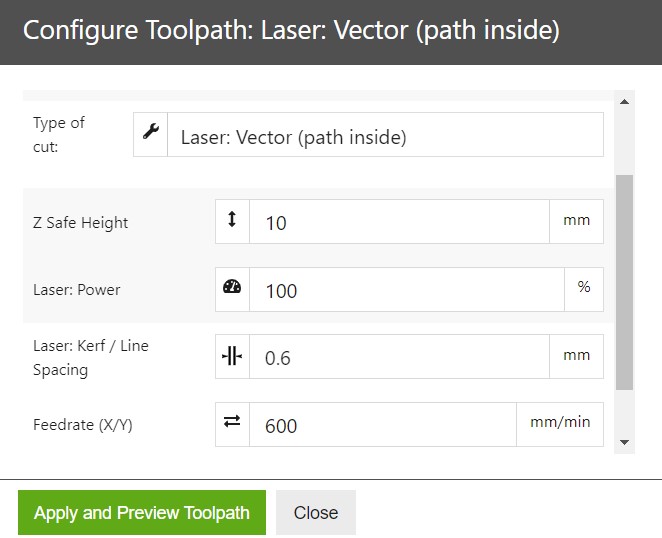
After running some tests, I found a feed rate of 600 mm/min worked well. I did try it faster, but it looked like the needle was bending slightly, so I slowed it down, and the cuts look amazing.
Testing the Needle Cutter
I use the Openbuilds CAM software and the same settings you would use for a laser cutter. So the needle is set as the kerf value. I tested this with a small rectangle preset in the software of 50×50 mm. Uploaded the g-code, and it worked amazingly well, and the accuracy was within 0.05-0.10 of a millimetre. Also tried a circle after that, and this looked good too.
So the next stage was to upload the g-code for my MiG-29 rebuild. To see how I created the g-code, check out my post PDF Plans to G-code

Software
To control my CNC router, I use OpenBuilds Control software. I made a posting on the site Converting my CNC Router to a USB controller, explaining how I converted my OX CNC to USB from the old parallel port. I use this in conjunction with the Openbuilds cam software. This is quite easy to use as it’s aimed at hobbyists.

Was it worth it?
I was a little sceptical of how good the cuts would be using the needle cutter. But I’ve been blown away by how good they are, and I must say a big thank you to all the guys who have developed this.
My cutting area isn’t that big; some parts I have to slice up in the software, which I can glue together afterwards.

If you build foam board models, then this CNC Needle cutter is a great way to cut the parts out. I hope this helps, and any questions, just drop me a line
Happy foam cutting.