How to Build a $200 USB Hot Wire CNC Foam Cutter – Free eBook
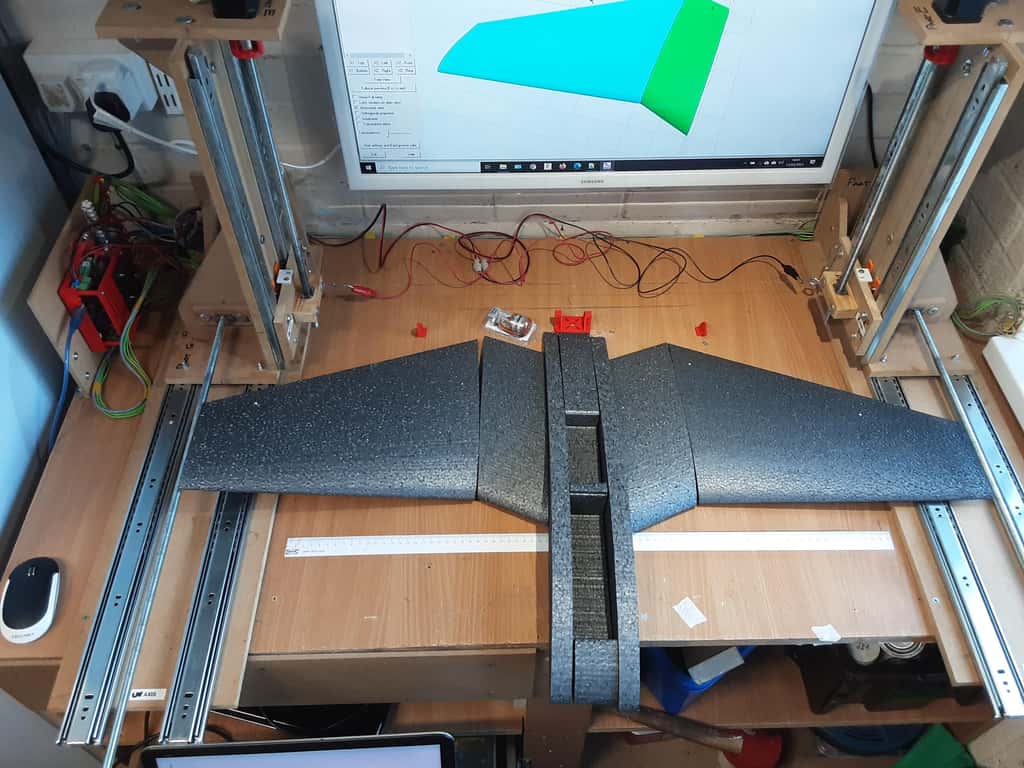
Would you like to build a CNC hot wire foam cutter using 3d printer electronics for around $200/£160/€180? The pictures below are some of the RC models I’ve built with my CNC foam cutter.


So why do I use a Hot Wire CNC foam cutter to make RC planes?
Isn’t it cheaper to buy foam models than building with a Hot Wire CNC foam cutter?
- Yes, it can be to start with but some of the big EDF foam jets can be quite expensive. I’ve seen a few crashes beyond repair at my flying club. The first flying wing I built with the machine flew fantastically well until I crashed it. I crashed it a few times but the last one was its final. So power up the machine cut some new wing cores and I was back in the air in a few days.
- Another reason is to build models that you can’t buy or if you could they would be very expensive. I enjoy researching and designing my own,
- Learning CNC has been great fun and the bug soon bit me. I now have a CNC router and 3d printer as well. These are great for those other parts that you can’t easily find.
How much will it cost to build?
Probably not as much as you think. Building the USB version in 2026 will cost approximately $200/£160/€180.
You may be able to do this cheaper if you already have some parts. Old 3d printers stepper motor, power supplies and sometime control boards can be used. Several guys have taken this route.
There is also free software which you can use to generate the G-code, Which works well and may be all you need. More details later in this article.
Free eBook
The eBook and plans contain full details with step-by-step instructions, there is a small charge for the plans but the eBook is free. The full-size plans can be printed on any printer except for two parts. These are then used as templates to get exact hole locations.
The plans also include the g-code for a Clark-Y airfoil to test the machine once built as well as the G-code to make a 38″/960mm flying wing. A full setup of the fly wing is included in the ebook.

I’ve had some great feedback and one question that pops up quite often is Can I use the USB interface on my computer for the CNC Hot Wire Foam Cutter? Yes, you can but I decided it was time to make a new version of my original CNC foam cutter.
So why a new design?
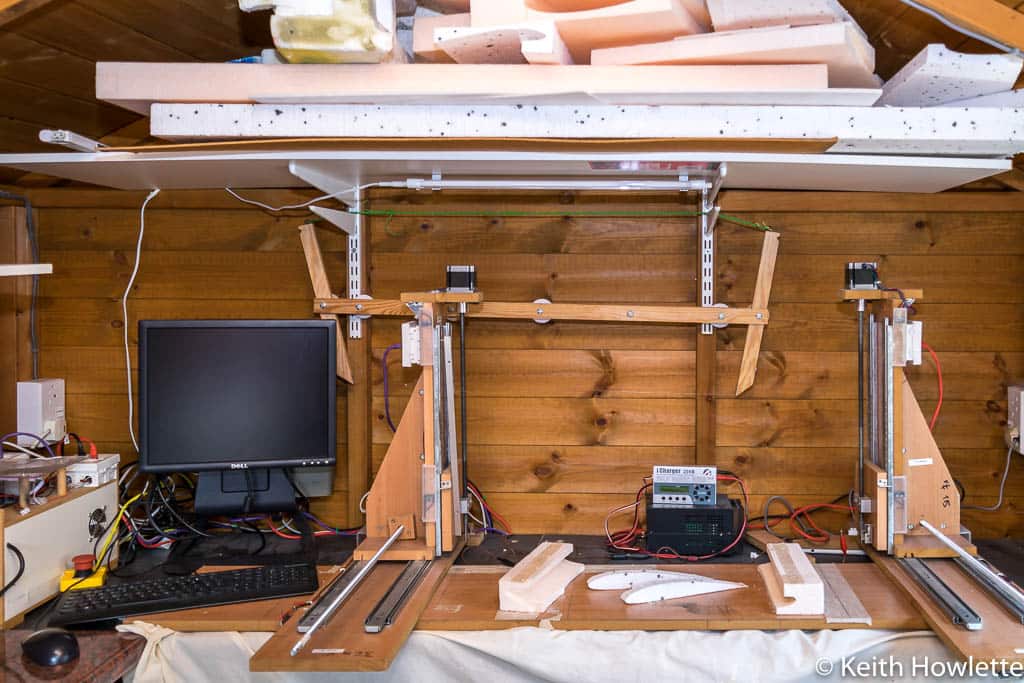
My old design, see below, used an old PC with a parallel port to run the CNC controller. This was very reliable and never failed me. However, these older computers may become more difficult to find, and mine was showing signs of failure. Since 3D printers are so popular and the hardware is relatively cheap, I’ve decided to use them in my new version.
This also helps to reduce the cost by about 30%. As of Nov 2023, 32-bit controllers running grblHAL are supported.
The eBook also includes details on how to build the old parallel port interface if you still want to use that option with bigger NEMA23 stepper motors.

My original plan was to convert the old design I built with 18mm HDF(high-density fibreboard) which I over-engineered a bit. But when I started to investigate the options using 3d printer stepper motors it soon became apparent the smaller steppers could struggle. It was a heavy machine and using smaller steppers might have caused step pulses to be lost. So I decided a lighter machine would be the way to go and reduce the cost a bit more using using NEMA 17 stepper motors.
The main goals of the new CNC Hot Wire Foam Cutter
- To run from modern computers with USB connectivity
- Lighter Design using 12mm MDF
- Utilise 3d printer stepper motors and controllers
- 32-bit controllers running grblHAL are now supported. FluidNC with ESP3D-WEBUI coming soon
- Comprehensive Plans, full size for key parts and detailed instruction,
- Easy to build.
- Still, be able to use the old parallel port interface with Mach3 and LinuxCNC if that’s your preferred option.
- 4-part video series showing how to build the new version.
Stop! Before you start
Before you build your machine I highly recommend you test some g-code generation software first. Most of the free software is fine for simple wings. But if you intend to build fuselages and more complicated wings you will need to purchase more capable paid software. All the paid software I use can be used in trial mode for 7 days before committing to buying.
I would always recommend starting with a simple wing first with the free software.
You may have heard of Mach3 or LinuxCNC which are very popular in the CNC world but these can’t be used with the Arduino controller. The ebook has full details and this website has tutorials with links to videos if you want to use either of these instead.

Cutting Range
The vertical travel is 350 mm (13.5″) and the horizontal is 550 mm(21.5″) using 450 mm and 750 mm threaded rods. You can use a longer threaded rod on the horizontal axis up to 1000 mm if needed but it will require longer drawer slides.
The distance between the carriages can be set quite far apart I have used up to 1000 mm with good results. My current setup is about 750 mm or around 30 inches. However, the hot wire may need more power depending on the type of wire you use. The MKS Gen L board can use 24 Volts which may be better on larger wingspans.
Swept-back wings can present a problem but you can produce highly swept wings with a small machine travel. We do this by aligning the trailing edge to the hot wire and afterwards cutting the root and tip to the correct angle. I did a video on this some time ago showing how to do this. https://youtu.be/_UFOHJPlza8
Foam Cutter Accuracy
I get questions about the accuracy of the machine using threaded rods for the lead screws and drawer slides for the linear motion. I can understand that. The accuracy required for hot wire foam cutting is not the same as needed for a CNC router. However, I still get good results when I compare the cut parts with the scale drawings. I’ve overlaid cut parts on top of drawings and it’s always been a perfect fit to the naked eye. See my video here where I show how accurate it can be.
The image below shows a Clark-Y airfoil cut with a root span of 250mm. As you can see it’s very accurate when you have your machine calibrated correctly with good hot wire control.

Electronics
We will start with the electronics first because we can get this tested and working before we install it on our machine. It’s good to know it works if you just purchased the parts. If we did the mechanical first it could be a while before we notice a problem with the electronics.
I’ve spent a considerable amount of time researching and testing the electronic components and have used the same stepper motors as many 3d printers. This helps to keep the cost down.
This new build uses the same type of controller found in many 3D printers. We can use the Arduino Mega 2560 with a RAMPS 1.4 board attached, or you can use the MKS Gen L V1.0 board. This is an Arduino Mega 2560 and RAMPS board combined into one board with a few extra features.
As of Nov 2023, you can now use the 32-bit boards that run grblHAL with an updated version of the control software. I have full details here for all the boards and the latest software Grbl HotWire for CNC Foam Cutters
For 8-bit boards, I recommend buying a genuine Arduino Mega if you can. Because I have seen it myself, the USB can sometimes be problematic to connect. The Chinese boards use cheaper components, and the build quality is not always the best. In one of my Arduino boards, the RAMPS board plug connectors were not straight. I did manage to straighten them, and luckily, it worked OK.
The stepper motors will be NEMA 17 size and use a 12 or 24 Volt Power Supply. Here’s the link to the Full parts list.
Here are the build guides for the electronics. These take you step-by-step for your chosen controller. These are easy to follow even if you have little experience


Alternative Firmware and Software – DevCNC Foam
DevCNC Foam is purpose-built for 4-axis foam cutting and will run on several hardware configurations. It can even be used to make an old parallel port controller compatible with USB using an Arduino. DevCNC Foam cost €65 in 2026.
One benefit as well is very easy to install and doesn’t require the Arduino IDE to load the firmware. It checks the controller board and uploads the correct version. You can try it for free for up to 400mm of total movement. Just enough to confirm your hardware works OK before you purchase a license.
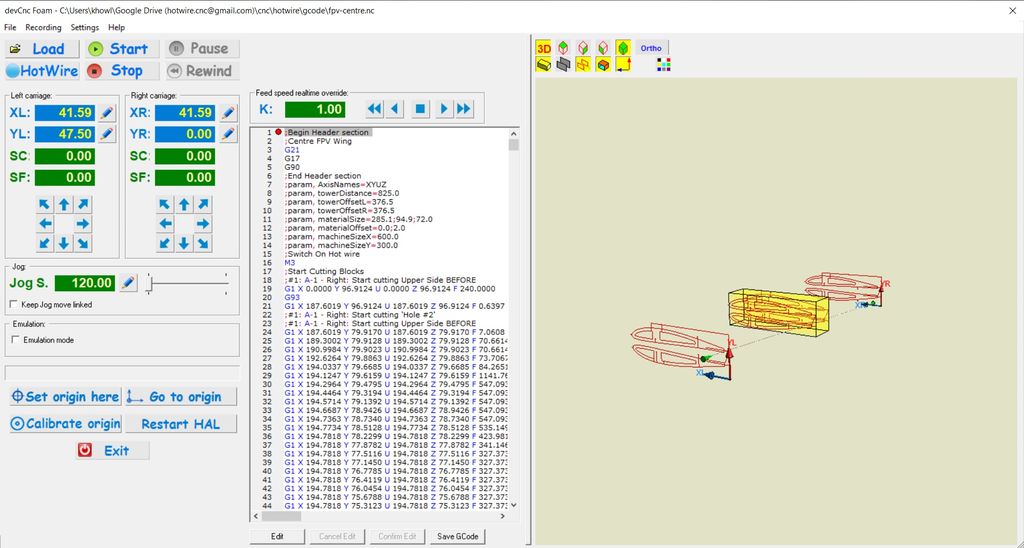
DevCNC Foam is very good and the wire path display is in 3d. It will also run in simulation mode so you can check how the foam will be cut. Very good for spotting errors. It’s saved me from wasting foam quite a few times.
What tools do I need?
To ensure the holes are drilled straight a pillar drill is very useful. I used M6 cross dowels with socket/Allen key heads to join the major parts, which are available at most DIY stores. These are great because you can take the machine apart very easily if you need to, without having to wonder which size screw did I use on this part.
For the mechanical part of the build, you do not need anything fancy just screwdrivers, pliers, measuring tools and a few clamps.
Building the mechanical side
Full instructions are included in the eBook together with a cutting list along with the plans. The plans are full-size plans with hole centre marks, except for 2 larger parts. The design uses metric dimensions which are a little easier to work with in my opinion.
I’ve used 6mm cross dowels and barrel nuts to join the main parts together with a few screws
 Base
Base Vertical
 Joined
 Built
Built
To save time and some expense take the cutting list to your local DIY store and get them to cut all the parts. My local store does you’ll get them cut to the correct size with nice square cuts.
Parts List
The parts list can be found here which includes the USB and Parallel Port versions.
Software to generate g-code
Once you’ve built your CNC foam cutter you’ll need software to generate the g-code to cut the foam wings or fuselage sections.
The software can be the most challenging part of CNC foam cutting. I would suggest starting with the free versions first and then upgrading as your skills and knowledge grow. I’ve used all the options listed below which will produce G-code for your designs. The paid options are excellent and worth the money in my opinion.
Free options
I have an entire post on the site and a video showing the free and paid options. G-code generation software to make foam wings and fuselages with CNC foam cutter
Paid options
The following software options need to be purchased which are a lot more comprehensive. You can use the demo versions which are full versions but the only restriction is you can’t save the g-code.

DevFus Foam will generate the g-code to produce the fuselage sections. My Hawker Hurricane and T45 Goshawk fuselages were built using this software. Once I could make wings the next logical step was fuselages. I have a full video series on my channel showing how to use DevFus Foam
Troubleshooting
The response to this project has been amazing and I get quite a few questions from builders. So I’ve made a video covering the most common issues and questions. It’s a long video so I’ve included time codes below. There is a post here covering troubleshooting as well. Please check these first as it may save you some time.

Support
I’ve been making foam aeroplanes for several years with my machine and it’s a real buzz to fly something you’ve made yourself. You’ll soon have people saying can you make me one.
If you have any questions first check the FAQ page https://rckeith.co.uk/hot-wire-cnc-faq/ and if that doesn’t answer them then drop me a line from the contact page. Good luck with your build, it’s a real sense of achievement when you see it all working.
Check the builder’s gallery showing some machines built by hobbyists like me. Some have put their interpretation of the design. Please send me pictures of your build and any models you’ve made and I’ll add them to the gallery.
If I can do it then so can you.